Food Menu Social Media Post Banner Guide for Creators
A well-designed food menu social media post banner can transform how your audience sees what you offer. Whether you run a café, publish recipes, or manage a food brand, a structured banner helps you present dishes clearly and attract attention quickly. The template described here offers a 1080×1080 pixel layout in a fully layered PSD format, giving you control over every element. No image is included, which means you supply your own photography, but the editable text, organized layers, and free font compatibility make it straightforward to adapt for any cuisine, style, or platform.
This article explores what makes such a banner useful, how different users can adapt it, and practical ways to keep results clear, original, and audience-friendly. You will find realistic examples, creative approaches, and actionable recommendations that balance inspiration with everyday application.
What Makes a Food Menu Social Media Post Banner Useful
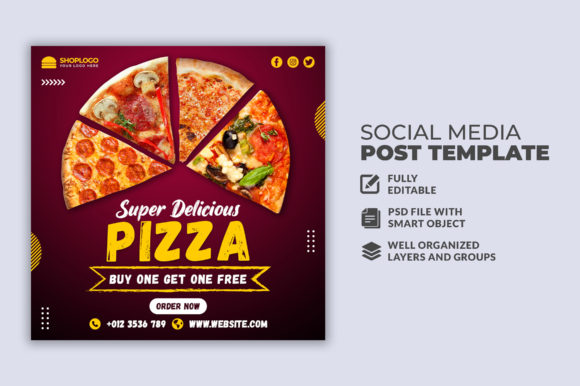
A food menu social media post banner serves as a visual anchor for your menu items. Instead of posting a plain list or a single photo, you combine text, layout, and imagery in one cohesive design. The 1080×1080 pixel square format works across platforms like Instagram, Facebook, LinkedIn, and Pinterest, so you can share the same asset without resizing. The PSD file with 100 layers gives you granular control—adjust colors, rearrange text blocks, swap fonts, or reposition elements without starting from scratch.
Because all text is editable with the Text Tool, you can update prices, dish names, descriptions, or promotional tags in seconds. Free font use removes licensing concerns, and well-organized layers mean you can find and modify specific components quickly. This structure is especially valuable when you need to produce multiple banners for different menus, seasonal offerings, or special events.
From a practical standpoint, a template like this saves time while maintaining consistency. You develop a recognizable visual identity across posts, which helps your audience associate the design with your brand. The absence of included images is actually an advantage—you choose original photography that reflects your actual dishes, making each banner authentic and specific to your business or project.
Creative Possibilities and Applications
A food menu social media post banner is not limited to restaurant menus. You can adapt it for recipe cards, meal prep guides, catering packages, bakery specials, or even digital cookbook previews. The layered structure lets you experiment with different visual directions without committing to a final version. Below are several practical applications.
Restaurant and Café Menu Highlights
If you run a small eatery, use the banner to feature a daily special or a seasonal dish. Place the dish name prominently, add a short description, and include the price. Use consistent typography and color accents that match your interior or logo. For example, a brunch spot might use warm pastels and handwritten-style fonts, while a steakhouse could opt for dark backgrounds and bold serifs. The organized layers let you duplicate the file and swap out images and text for each item, building a library of menu posts in minutes.
Recipe Sharing for Food Bloggers and Creators
Food bloggers can repurpose the template as a recipe card. Use the main text area for the recipe title, a brief ingredient list or serving suggestion, and a call to action directing followers to the full recipe on your blog. Because the banner is square, it works well for Pinterest pins and Instagram carousels. You can create a series of banners for a themed collection, such as summer salads or one-pot dinners, keeping the layout consistent while varying colors and images to match each dish.
Meal Prep and Subscription Services
Meal prep businesses or subscription boxes can use the banner to display weekly menus or plan options. Include the meal name, key ingredients, calorie or protein info, and price tier. The editable text means you can update the banner each week without redesigning the entire graphic. Use separate layers for headers, subheads, and footnotes so you can maintain a clean hierarchy. A simple two-column layout within the square can show different meal plans side by side.
Event and Pop-Up Promotions
For food trucks, pop-up dinners, or catering events, a banner can announce the menu ahead of time. Emphasize the event name, date, location, and a short list of featured dishes. The layered structure allows you to create urgency with limited-time tags or countdown text. Because the template is fully editable, you can adjust the tone—playful for a casual event, elegant for a formal dinner.
Adapting for Different Audiences and Platforms
Different audiences respond to different visual cues. A young, trend-focused crowd might prefer bold typography, vibrant colors, and minimal text. A family-oriented restaurant audience may respond better to warm tones, clear labeling, and photos that show portion sizes. The 100 layers give you the flexibility to tweak the banner for each demographic without starting from scratch.
- Instagram and Facebook: Use the square format as a single post or carousel. Keep text concise since users scroll quickly. The top third of the banner should contain the most important information—dish name or price.
- Pinterest: While square works, you might also create a vertical version by rearranging layers in the PSD. Focus on the recipe title or menu name and use a high-contrast background to stand out in search results.
- LinkedIn: For professional audiences, such as B2B catering or food industry networking, keep the design clean and understated. Use neutral colors and avoid decorative fonts. The editable text lets you add company details or service descriptions.
- Email newsletters: Export the banner as an image to embed in email campaigns. Since the template is 1080×1080, it scales well across desktop and mobile inboxes. Use it to preview a new menu or seasonal offering.
Consistency across platforms matters. Keep your logo placement, font choices, and color palette stable even when you adjust the layout for different audiences. The organized layers make it easy to create platform variants from one master file.
Keeping Results Clear and Organized
Clarity is essential for a food menu banner. A viewer should understand within seconds what the item is, what it costs, and why it appeals. To achieve this, prioritize information hierarchy. Use the largest text for the dish or menu name, medium text for descriptions or key selling points, and smaller text for prices, dates, or disclaimers. The template’s layers let you adjust font sizes and spacing independently.
White space is your friend. Avoid cramming too much text into the square. A common mistake is listing every ingredient or writing long paragraphs. Instead, use short phrases, bullet points, or icons. For example, instead of “Our house-made sourdough bread with avocado, cherry tomatoes, and a sprinkle of chili flakes,” write “Smashed Avo Sourdough — cherry tomatoes, chili flakes.” The banner is a teaser, not a full description.
Color contrast between text and background improves readability. If your food photo is busy, place a semi-transparent overlay or text box behind the copy. The layered PSD supports these adjustments easily. Test your banner on a smartphone screen before finalizing—if text is hard to read at thumbnail size, increase contrast or font weight.
Maintaining Originality and Brand Consistency
Using a template does not mean sacrificing originality. The 100 editable layers give you room to inject your brand identity. Swap out default colors for your brand palette, replace placeholder fonts with your chosen typefaces, and add distinctive graphic elements like lines, badges, or icons. Because no image is included, every banner will look unique based on your photography.
Consider creating a set of brand guidelines for your banners: which fonts to use for headings and body text, acceptable color combinations, logo placement, and photo style (bright and airy vs. dark and moody). Apply these rules consistently across all banners. This builds recognition over time. When followers see your banner in their feed, they should immediately associate the design with your brand, even before reading the text.
For publishers or educators creating multiple banners, save each variation as a separate PSD file within a project folder. Name layers clearly (e.g., “heading_primary,” “price_tag,” “image_holder”) so you or a team member can navigate quickly. This kind of organization reduces errors and speeds up production when you need to update or repurpose a design.
Practical Examples for Different Goals
Let us look at three realistic scenarios where this template shines.
- Café launching a seasonal menu: The owner uses the banner to feature a pumpkin spice latte. The top layer shows the drink name in a bold serif, a short description below, and the price at the bottom right. The background photo shows the latte with autumn leaves. The editable text lets the owner update the description when the drink changes next season.
- Food blogger promoting a recipe: The blogger creates a banner for “15-Minute Garlic Noodles.” The title is large and centered. Below it, a short ingredient list: noodles, garlic, soy sauce, butter, parsley. A subtle call to action reads “Full recipe at link in bio.” The blogger duplicates the template for other quick recipes, changing colors to match each cuisine.
- Catering company showcasing packages: The company uses the banner to display three tier options: Bronze, Silver, Gold. Each tier has a short list of included items and a price. The layout uses columns created within the 1080×1080 canvas. The organized layers allow the team to update prices quarterly without redesigning.
Each example keeps the banner focused, uses the editable features to maintain consistency, and relies on original images to differentiate the content.
Recommendations for Getting Started
If you are new to using a layered PSD template, start by opening the file in Photoshop and exploring the Layers panel. Turn visibility on and off for different groups to understand the structure. Rename layers to match your own content as you go. Begin with one banner to test your layout, colors, and font choices before producing a series.
Use free fonts that align with your brand personality. Sans-serif fonts work well for modern, clean designs. Serif fonts add a traditional or upscale feel. Script fonts should be used sparingly, only for accents or subheadings. The template specifies free fonts, so you do not need to purchase licenses.
Keep a backup of the original PSD. If you make extensive changes, save your customized version separately. This way you can always return to the base template for new projects.
Test your banner across devices. What looks balanced on a desktop monitor may appear crowded on a phone. Export a preview, view it on your mobile feed, and adjust text size or spacing if needed. The 1080×1080 resolution ensures sharp output, but composition matters more than pixel dimensions.
Final Thoughts
A food menu social media post banner is a practical tool for anyone who shares food content regularly. The combination of a fully layered PSD, editable text, free fonts, and a square format gives you the flexibility to create professional posts without starting from zero. By focusing on clarity, audience needs, and brand consistency, you can produce banners that inform and engage. Whether you are highlighting a single dish, promoting a recipe, or announcing a new menu, this template provides a solid foundation that leaves room for your own creative direction.